Saturday, March 28, 2015

Trajectories Lab

The objective of this lab was to use what we have learned about projectile motion to predict where an object will fall under gravity's influence.

First, we created a setup that would allow us to launch an object totally under the influence of gravity so that we don't have to touch it and mess up its motion.  We used two aluminum channels, a steel ball, a board, ring stand, clamp, paper and carbon paper (setup below).

After we created our setup, we did a trial run to see where the ball would fall and placed our paper, with a sheet of carbon paper sandwiched between, where it landed on the floor.
After that we launched the ball five times and where the ball landed on the paper, the carbon paper left a mark.  We measured the distance where the ball left the track to where it landed on the paper on the floor and the distance the ball fell.  It turns out the distance the ball traveled in the x-direction was 0.472m with 0.0035m of uncertainty from the spread of measurement values in addition to 0.001m of uncertainty in taking measurements for a total of 0.0045m. From measuring the distance the ball fell, we got 0.9375m with 0.001m of uncertainty from taking measurements.

We were then asked to determine the speed at which the ball launched from our setup using the measurements we took (calculation below).


Next we were asked to predict where the ball would land if there was a board leaning against the table at an angle.  We leaned the board against the edge of the table and used our phones to measure the angle it makes with the floor; which turned out to be 49.1degrees with 0.1degrees of uncertainty.  Using this, we predicted that our ball would land a distance d from the point of launch.  As a side note, we can't use the time of 0.44s because the ball is not falling the same distance so we had to find a substitute for it (calculations below).


From our calculations, we got the theoretical distance the ball falls on the board d=0.41m.  We then proceeded to run five trials with the board at the angle of 49.1degrees and found our experimental distance to be d=0.428m.

We were next asked to calculate uncertainty for the experiment (calculation below).


Interestingly, after calculating for d with the formula in terms of x, y and theta the number rounds up to 0.42m (0.41899m).  I believe this comes from my rounding of the value for the initial velocity coming off the ramp.  I will be comparing my experimental value of d against my theoretical value for d with respect to x, y and theta.  Our calculated value of 0.42m was 1.87% below our experimental value of 0.428m.  Our error for this experiment may have come from our taking measurements of each individual trial and from the rounding of values used in calculations.


Friday, March 27, 2015

Modeling Friction Force

For this lab, we had five different setups to measure and observe friction in different situations.  Two of them dealt with static friction while three dealt with kinetic friction.

For the first setup, we wanted to measure the static friction coefficient between a block with a felt surface and the table top of our desk.  To get the most accurate value of a static friction coefficient, we attached a string to the block, hung it over a pulley and attached a cup to the other end so we could slowly add water and find the hanging weight that would finally overcome static friction  (setup below).  We weighed and found the masses for the block with felt and the cup with enough water to make the block start moving.  We then added another block and more water to repeat the process.  We repeated this until we had four blocks in total being dragged and recorded the mass of the water each time we added a block (table below).  We then graphed our data in Logger Pro and found that the values are proportional to each other by a multiple which happens to be our static coefficient (graph below).  As seen in the graph, the coefficient of static friction for Part 1 is 0.183.


I calculated the coefficient of static friction myself and found that I got different values for each trial (seen below). I think we weren't as careful as we could be when adding water to the cup.


Part 2 of the lab dealt with kinetic friction.  This time, we used a force sensor when we took data (seen below).  In order to use the sensor we had to calibrate it which required us to hang 500g from the little hook it has and then set it on its side and zero the sensor.  We then attached the wooden block we were using before with a string to the sensor and pulled at a constant speed while collecting data.  We repeated this process until we were pulling the same four blocks in total.


We then stored each run for its data and graphed the values to get a kinetic friction coefficient of 0.232 (seen below).


For Part 3, we measured static friction on a sloped surface (setup below).  For this part, we raised a track with the felt surface block on it with one of our phones on it to measure the angle at which the block starts to slip.  This was the 0.1307kg block and it started to slip at an angle of 14 degrees.


With a simple calculation with force diagrams, we were able to obtain the coefficient of static friction (seen below).


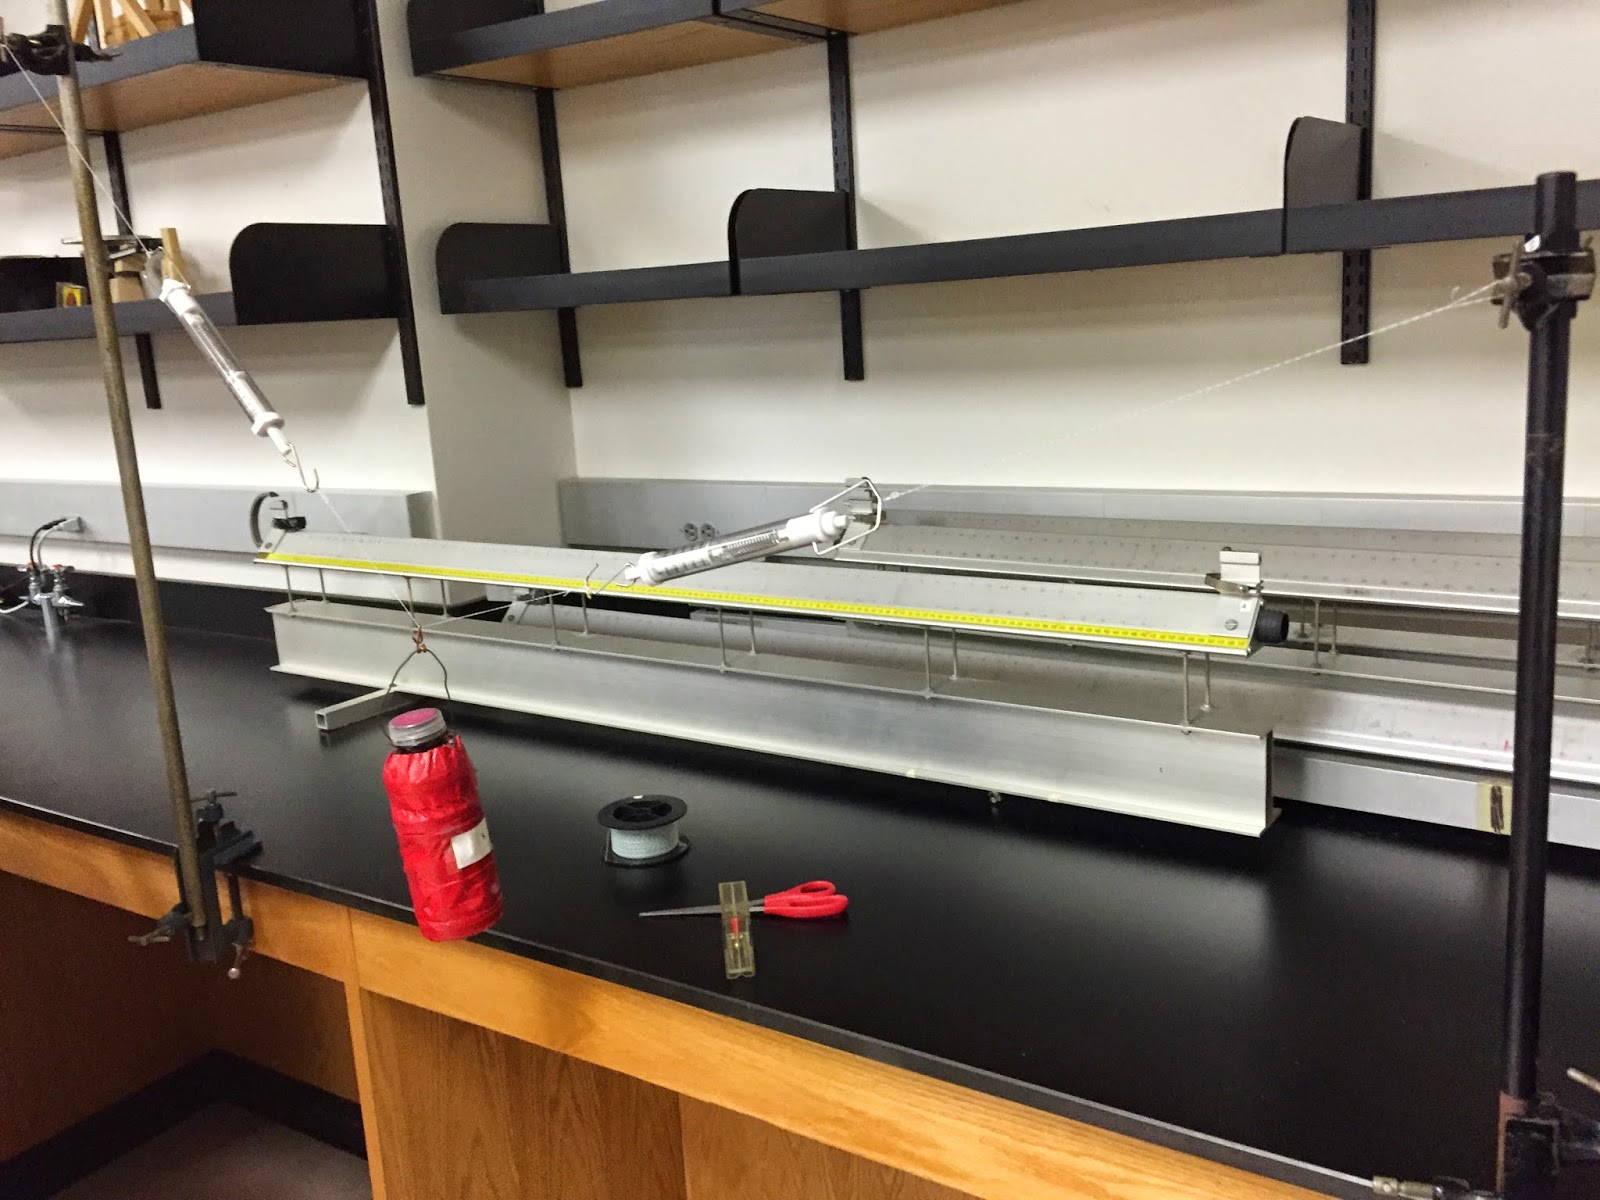
Part 4 of our lab required that we use a motion detector attached to our track at the top to measure the acceleration of the block as it slides down (setup below).  We also measured the angle it was sliding at with our phone.


Seen below is the graph of our block sliding down the track.


The slope of our velocity graph here is our acceleration, a=1.854m/s^2, which we use to calculate the coefficient of kinetic friction.


Part 5 of the lab has us use our coefficient of kinetic friction from Part 4 to find the acceleration of the block if it was attached to a hanging mass that is "sufficiently heavy".  We were to first create a model and a prediction for what the acceleration would be (seen below).  Here we set our hanging mass to a value of 0.05kg and got a=0.835m/s^2.


We then hung a 0.05kg mass to the felt block over a pulley and used a motion sensor to track the block.  Below is our findings with acceleration being listed as 0.5571m/s^2.  Our value is kinda off  because factors outside of an ideal situation which is assumed in our prediction could have taken place.  Maybe the block skipped or we didn't have the string parallel to the ground when the hanging mass fell or there might have been left over tape on the track.


Thursday, March 26, 2015

Propagated Uncertainty in Measurements

In this lab, we were given a small cylinder of aluminum, steel and copper (seen below).  We were then asked to take measurements and find out what the density of each was using a pair of calipers (seen below).


Each measurement had a value of uncertainty due to the precision of the calipers which was 1 millimeter.  In order to find the uncertainty value for density, we need to take the partial derivative of the formula for density with respect to each individual variable of mass, diameter and height (example below).  When you take the derivative with respect to one of these variables, the derivative of the variable is equal to the uncertainty in the value.

Our densities were Aluminum=2.74g/cm^3 with uncertainty=0.050g/cm^3, Steel=7.60g/cm^3 with uncertainty=0.178g/cm^3 and Copper=9.06g/cm^3 with uncertainty=0.178g/cm^3.


The next part of the lab was to find the mass of two unknown hanging objects by measuring the force applied on each string from the spring scale and the angle made on the string (see below).  To measure the angle, I used an app on my phone which measures to a tenth of a degree.  You also have to be mindful of the fact that the uncertainty for the angles needs to be in radians so simply multiply the uncertainty by the ratio 2pi/360degrees.  The uncertainty for the angles turned out to be 0.0017rad.  There were three stations and I chose to measure stations 2 and 3.  After taking partial derivatives of tensions one and two and angles one and two, I arrived at my answers of m=0.76kg with uncertainty=0.061kg for station 2 and m=0.94kg with uncertainty=0.05kg for station 3.


Free Fall Lab


The objective of the Free Fall lab was to determine a constant for gravity from the marks on our strip of tape produced by the spark apparatus (shown below).


Our Professor ran the experiment as a demonstration of how the apparatus works then handed out the tapes which contained data from previously run trials.  A free fall body is held in place at the top by an electromagnet and when released, falls and marks on the tape its position every 1/60th of a second.  Being that there are a lot of marks on the tape from us to choose from and we only need a few, we are allowed to start from wherever we think the marks are clearest.  We decided on a starting point and recorded fifteen distances from that point.

We then used Microsoft Excel to help us with our lab because it is very good to use for computing large amounts of simple calculations.  We created a data table and filled in our measurements from recorded data and the equations our Professor provided for us (shown below).


We then created two graphs; one based on our measurements on the tape (X) vs time and another with mid-interval time vs mid-interval speed.  To make our X vs Time graph, we selected our values from the time and distance columns respectively and chose a polynomial fit for the trend line type (graph seen below).

We then created a graph based off our values for our mid-interval speed and mid-interval time to show that acceleration is constant through out the experiment.  We then looked at the slope of our mid-interval speed and mid-interval time graph to get the slope which was what our data calculated acceleration due to gravity to be.  The number we got was 930.46 cm/s.  We know that the well established gravitational acceleration constant for earth is 9.81 m/s.  We have an error of 5.20% below the established value.  We could have also gotten the acceleration from our position vs time graph equation of the line.  There we see that it is a second order polynomial equation.  Comparing this with our kinematic equations for constant acceleration, ∆x=(v0)t+(1/2)at^2,  we see parallels between the two giving us 1/2a = 472.54 or a=945.08.  The error for this number is much smaller at 3.66% below the established value.


In the next part of the lab, we wanted to see just how good the spark apparatus was for acquiring data.  Each group presented their acquired value for g and we entered then into our own Excel spreadsheets (seen below).  We found the class average for the g value to be 956.03 cm/s^2.  Using this, we found how much our individual values deviated from the class average.  Unfortunately there were negative values so we squared the deviations, took the average of the squared deviations and then took the square root of the average deviation squared to give us 20.12 which is our average deviation of the mean.

In conclusion, the spark apparatus is not a very good tool for obtaining data.  With values as high as 992 cm/s^2 and as low as 926.20 cm/s^2  the spread of values is kinda big.  Our class average for g values is 2.55% below the accepted value for g at 9.81 m/s^2 which is just alright.  What might account for the difference between the class average g value and our g value is the uncertainty which came up from measuring with a meter stick.  The uncertainty in the measurements wasn't too big at 1 millimeter and we checked the measurements amongst our lab group.  For the individual group g values to be so different must come from the data produced by the spark apparatus.  I realize from hindsight of this lab that the big ideas here are that the equipment you use to obtain data and take measurements is very important to your findings.  Also, that taking multiple experiments is necessary to get more reliable and accurate values.  Finally I learned that knowing how to compute error is necessary for determining just how good your findings are and if you should present them to future employers.  

Sunday, March 1, 2015

23-Feb-2015: Deriving a power law for an inertial pendulum


For our lab, we were tasked with finding out the relationship between an inertial pendulum (seen above) and its mass.  First, we set up the inertial pendulum by clamping it to the table without any weights on it.  Next we got our laptop and LabPro all set up and connected with a photogate (seen above) plugged into the DIG/SONIC 1 input slot.  The photogate takes data when something breaks through the beam so we attached a piece of tape on the end of the pendulum to pass through it.  Theres a file in the computer called Pendulum Timer.cmbl that works through Logger Pro that you have to use with the photogate.


Next step is to test your photogate with a trial run.  Time a number of oscillations and see if the numbers reasonably match up.  Now you can start your trials starting with no weight on the end and working your way up to 800 grams in increments of 100 grams.  Seen below are my trial periods.


After you get your trial period times, find the periods of two mystery items.  My group used a black tape dispenser=0.605kg, and one of our group's keys=0.105kg.  We now guess that the period is related to the mass by a power-law type of equation T=A(m+Mtray)^n.  Unfortunately we have three unknowns in the equation.  In order to solve them, we are going to change the equation into something we are used to working with.  Taking the natural log of both sides of the equation gives us lnT=n*ln(m+Mtray)+lnA which resembles the equation of a line y=mx+b.


Now input the masses and periods into the rows and columns of a new Logger Pro file only after you close the photogate file.  Go to the Data drop down menu and click on Column Options.  There you can designate X and Y to be Mass in kg and Period in seconds.  Now go to the Data drop down menu and click on User Parameters to create the parameter Mtray and assign it a weight with an educated guess.  Once again go to the Data drop down menu and this time click on the New Calculated Column and create three new columns for m+Mtray, lnT and ln(m+Mtray).

Now plot lnT vs ln(m+Mtray) and apply a linear fit to the points.  The line that says correlation is how close your points come to making a straight line and is also dependent on how close your educated guess was to the actual mass of the pendulum.  Now you just need to play with the mass values until you get a range of masses that gets you the correlation closest to one.  For us, the range of mass values that got us the highest correlations was from 0.295g-0.300g.  From the information in the box, you can substitute in the numbers you get into your power-law equation.  From the graph (seen below) m=0.6664 and our b=-0.429.  After plugging in our values from the graph into the formula, I took the inverse of the natural log of both sides of the equation and plugged in numbers to get values for the period (example below).